For meters where a data integration is not possible you can choose to create manual meters, to have all data in one place and include it in the reporting. If you have larger amounts of historical data, we can help you upload these. Please follow the steps listed here.
To upload data, the manual meter has to be created either as an interval or counting meter.
To create a manual meter and upload data, follow the steps below.
1\. Go to Settings

2\. Click "Meters"

3\. Click "Add Manual Meter"

4\. Add a meter name

5\. Click the "Site" field.

6\. Select the site you want the meter to be allocated to

7\. Now you can check the different settings and choose
- The meter type
- The data type
- To include the dat in the reporting or not
- To include the data in the analysis or not
- The timezone
8\. Click "Save" to save all information and type in the manual readings

9\. You can choose weather you want to upload manual readings based on yearly, monthly, daily or hourly data.

10\. Choose the frequency and the energy

11\. You can add an multiple datapoints at once, by clicking “+Add row”
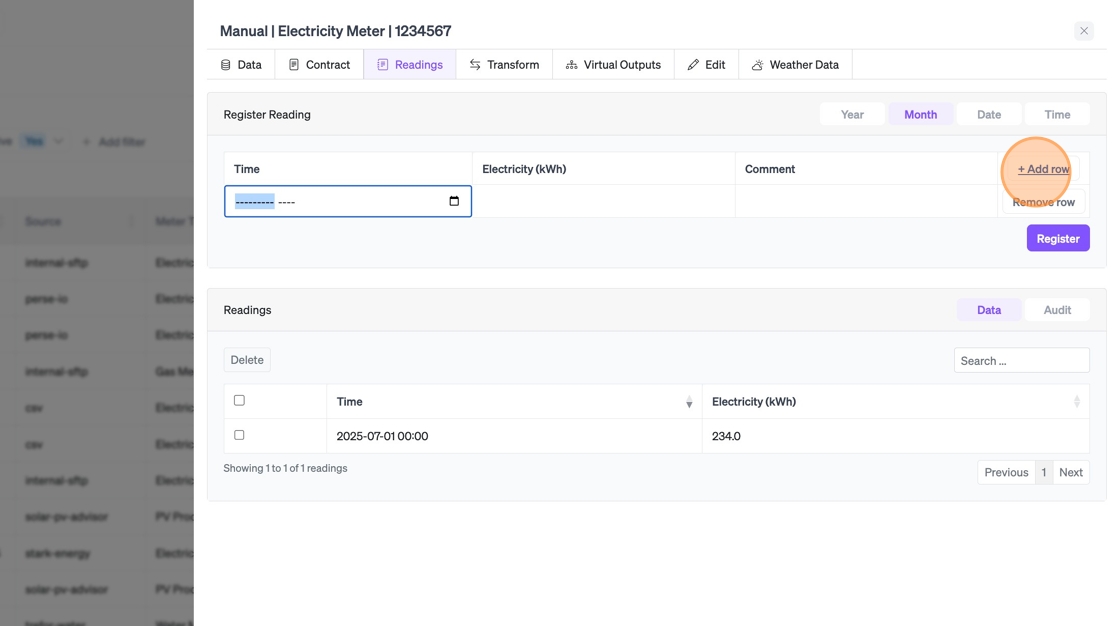
Once you’ve added the data entries, the data will be visible on the meter, and on the selected site. You can always open the settings of a manual meter, to to enter new data entries.
Set up a reading schedule for manual meters
With a reading schedule, you make sure your manual meters are read on time. When a reading is due, Ento sends an email reminder to the chosen recipients with a direct link, where they can register the reading – also from their phone.
To set up a reading schedule, follow the steps below.
1\. Go to "Settings" → "Manual Meters"
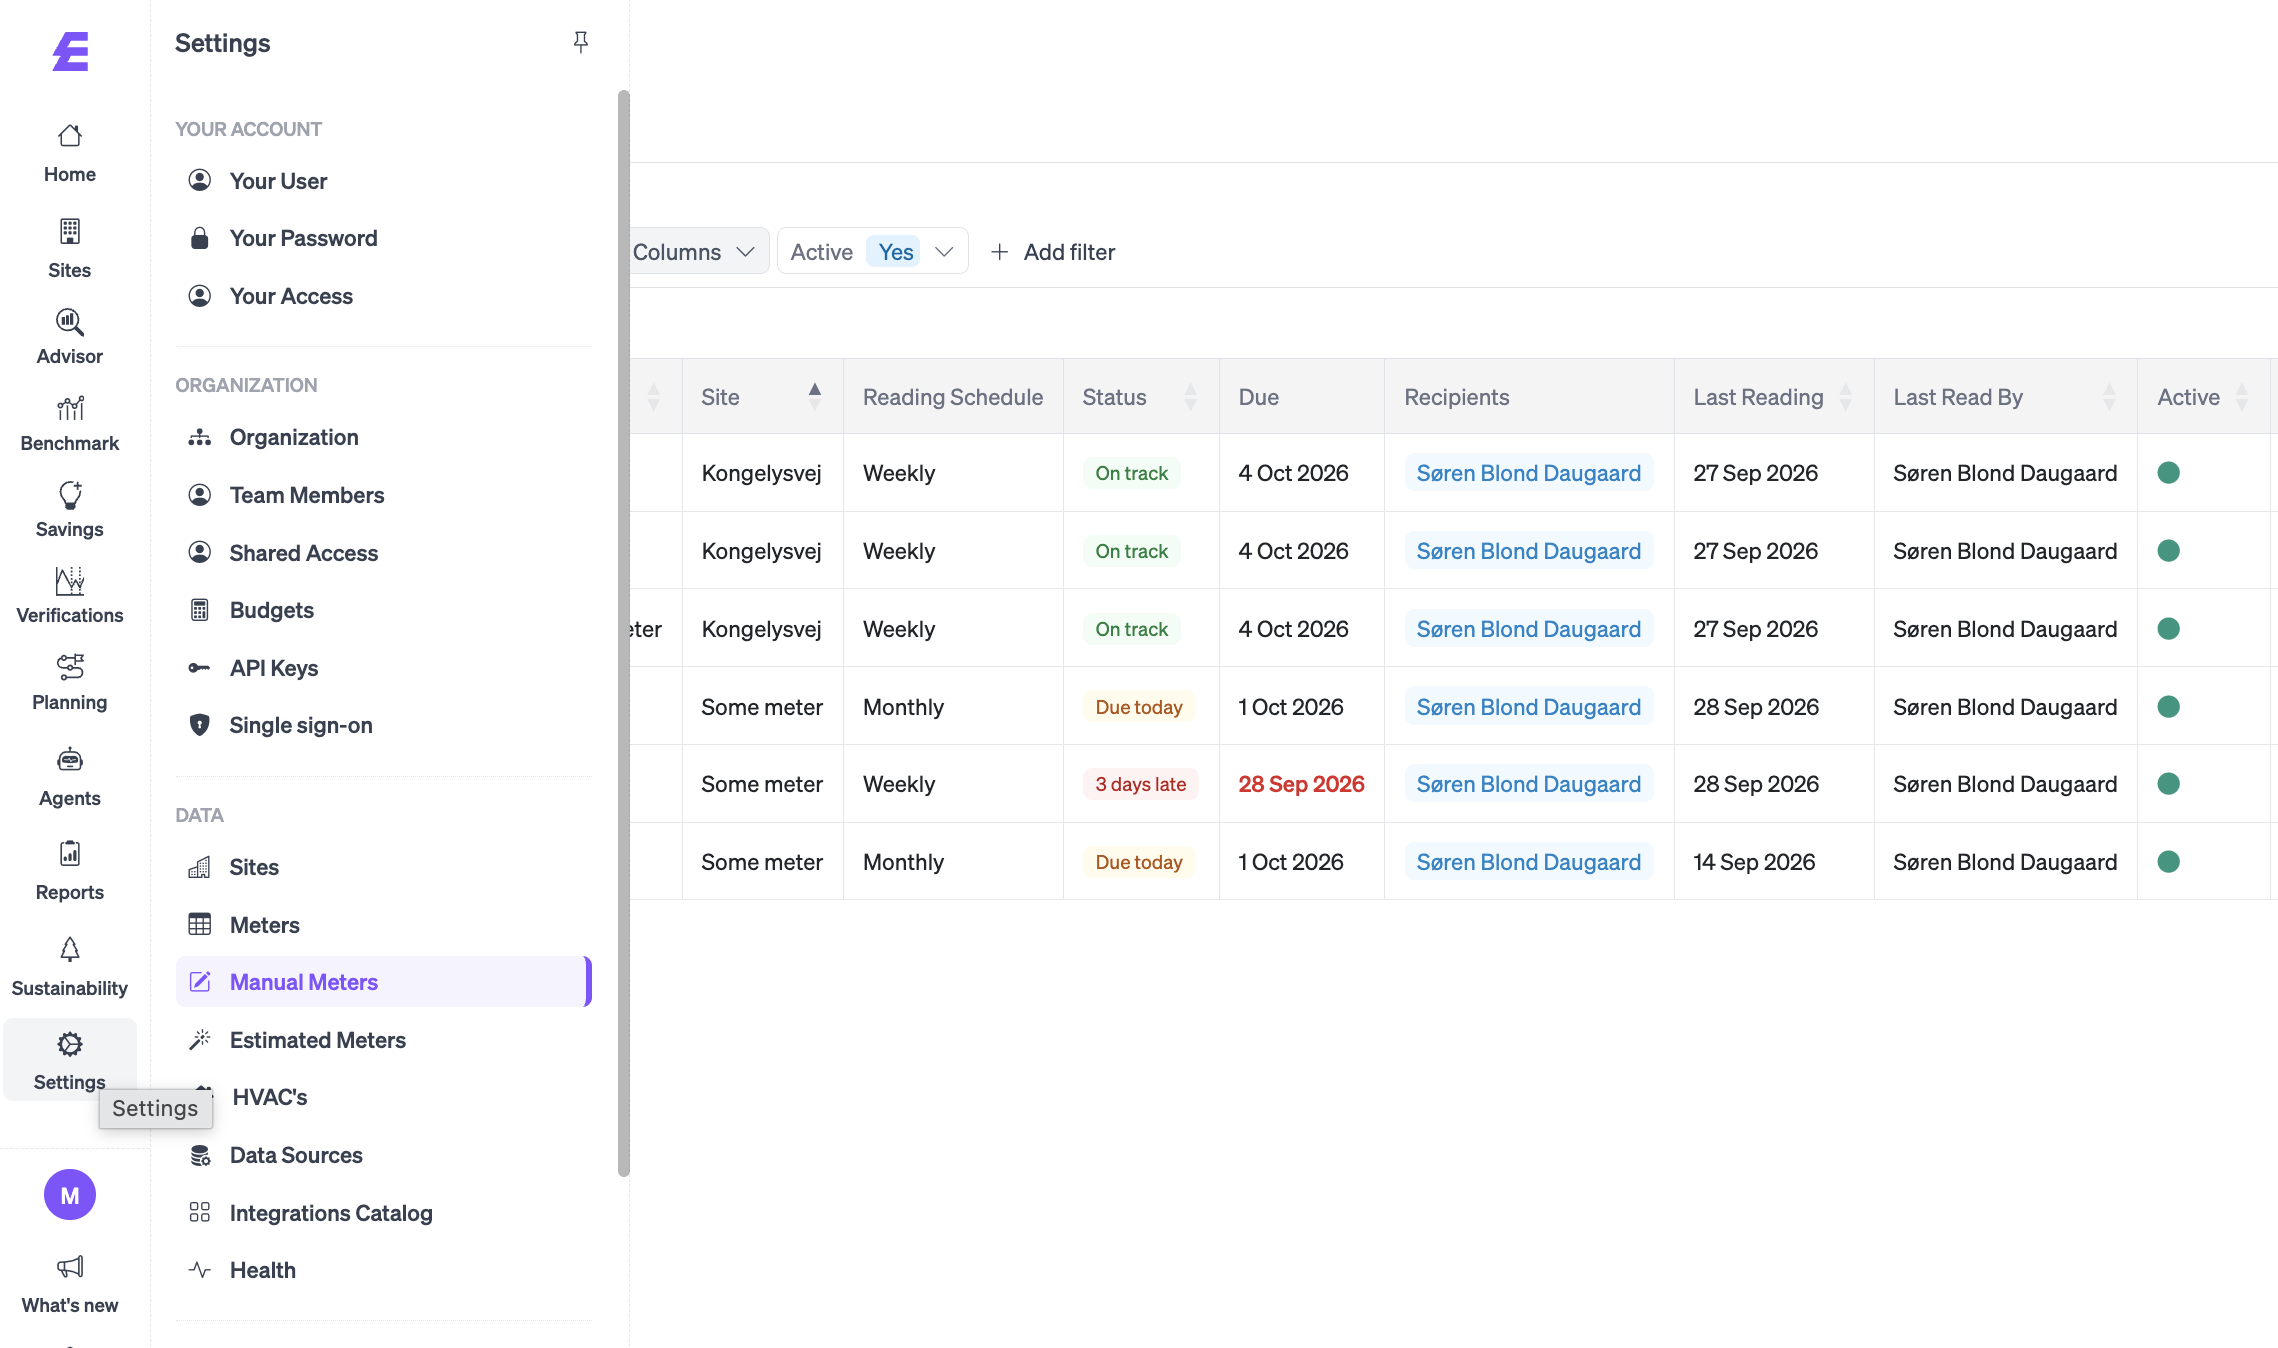
Here you get an overview of all your manual meters, including their reading schedule, status, due date, recipients, last reading and who made it. Use the filters "Active", "All" and "No schedule" to quickly find the meters that don't have a schedule yet.
2\. Click "Edit Reading Schedule" on the meter you want to set up
3\. Choose the "First due date" – the date of the first reading
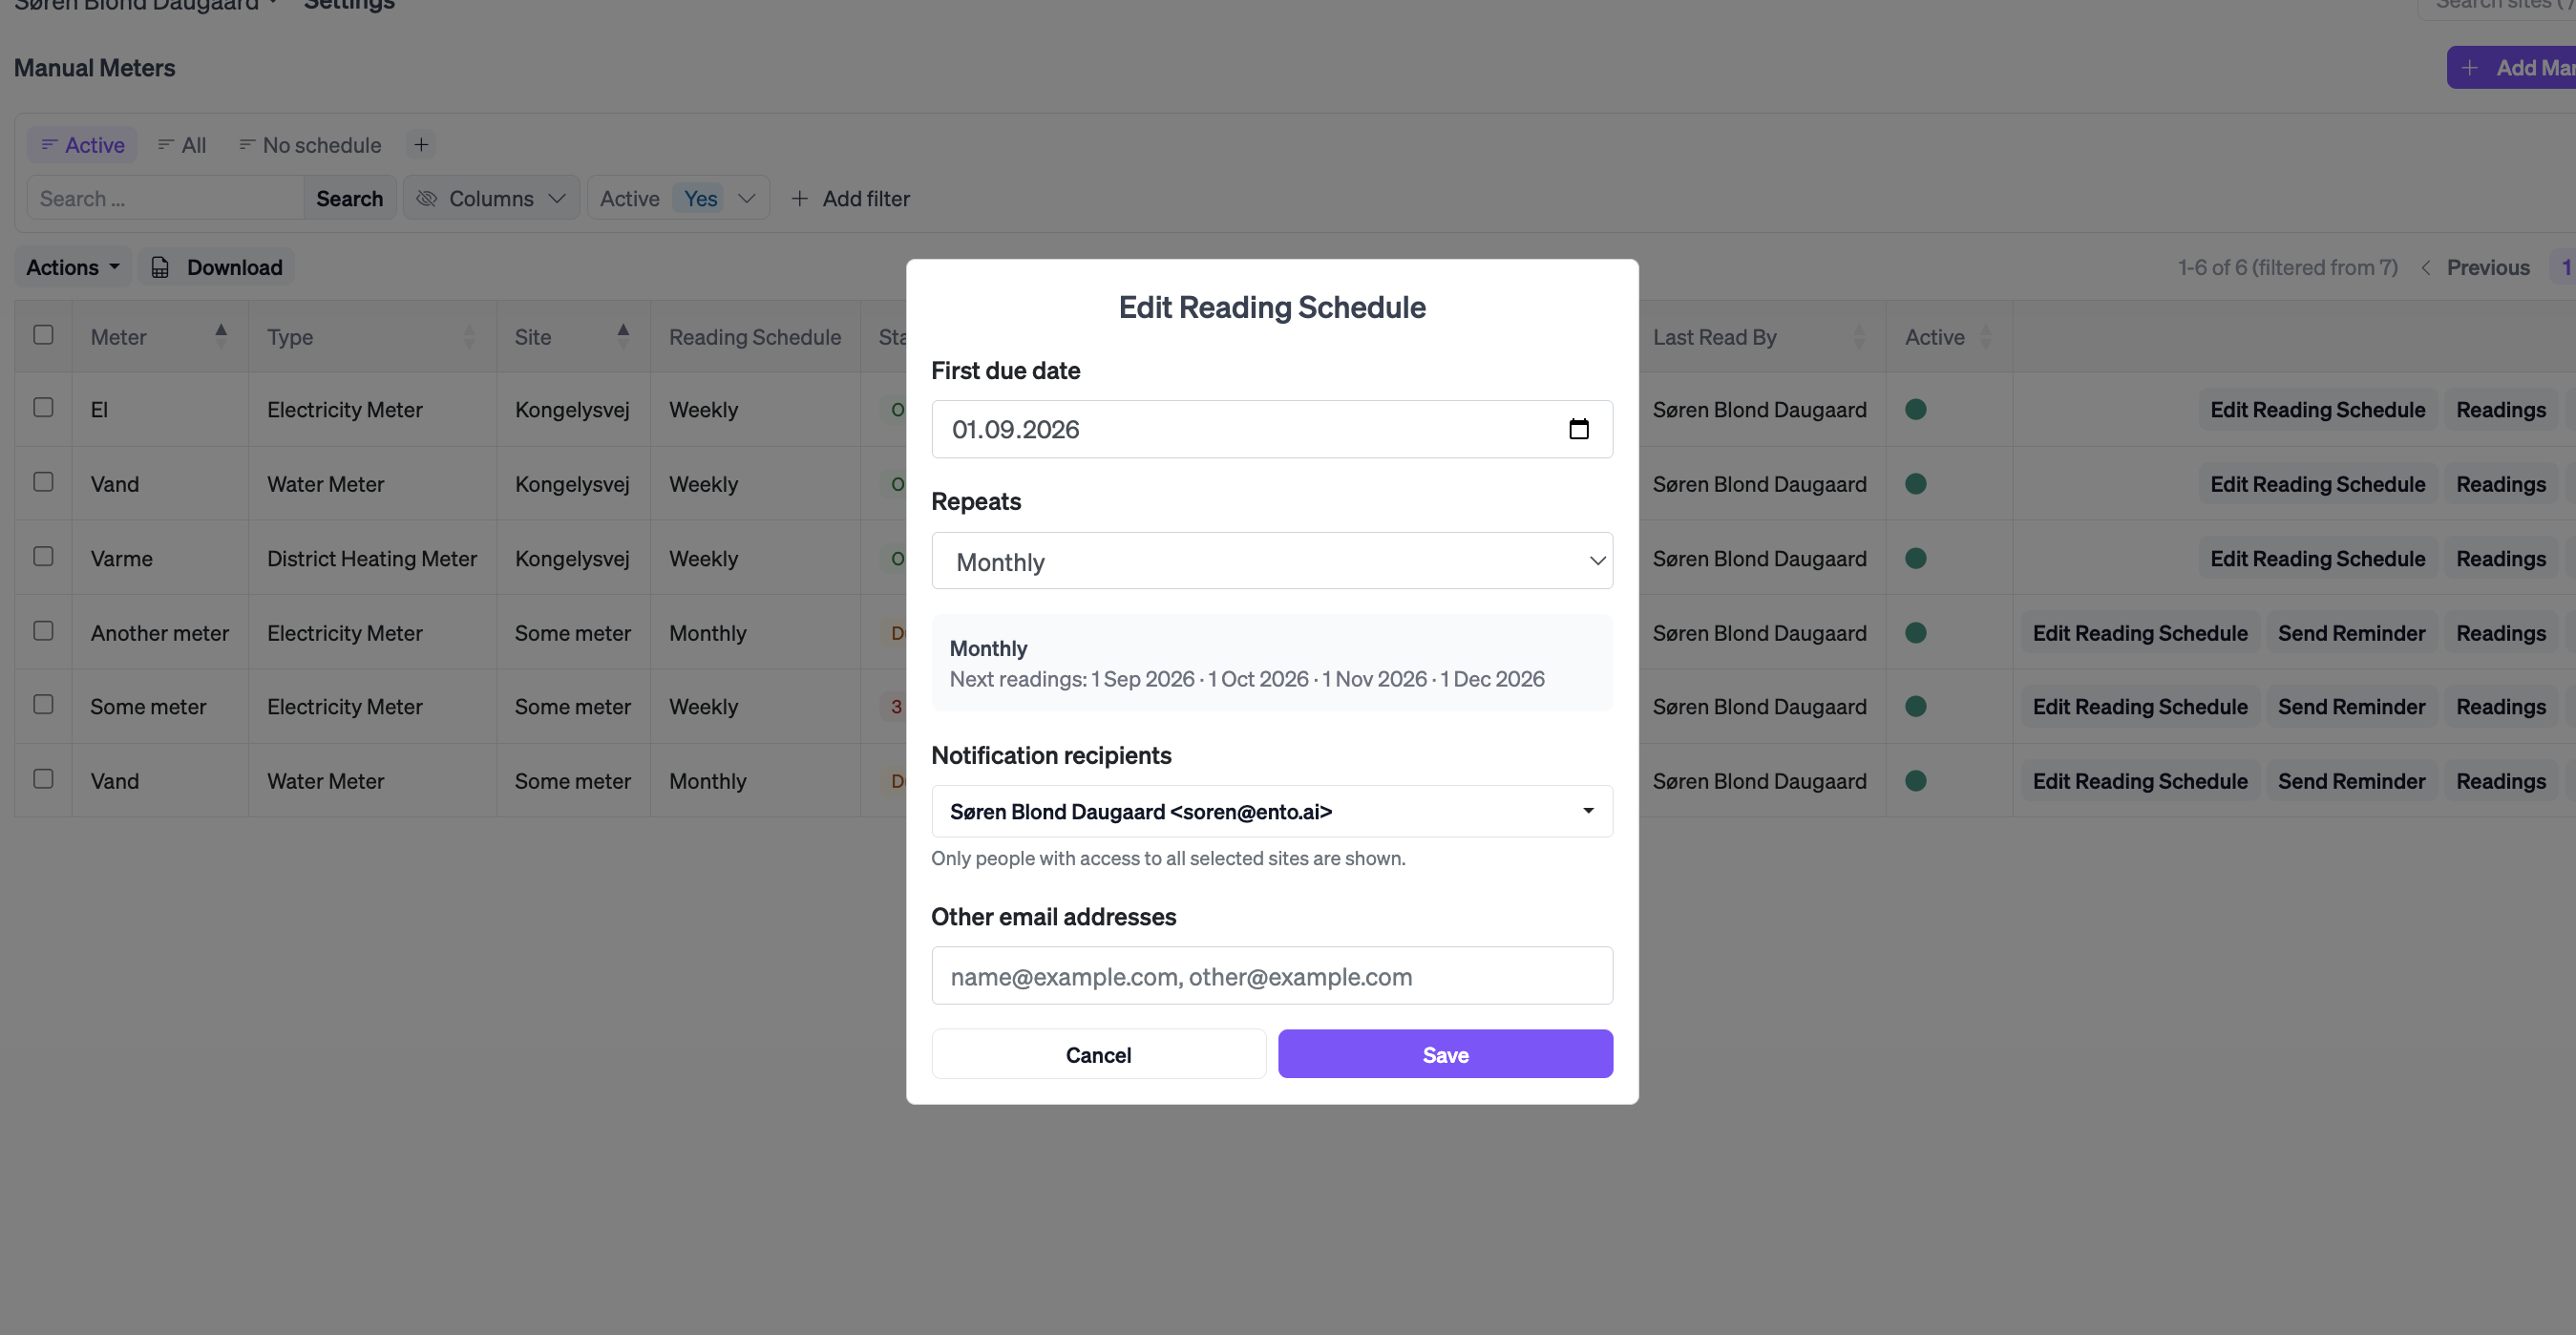
4\. Choose how often the meter should be read under "Repeats"
- Weekly
- Every two weeks
- Monthly
- Every two months
- Quarterly
- Every six months
- Yearly
Below the field, you can see the next upcoming reading dates.
5\. Select the "Notification recipients" who should receive the reminder
Only people with access to all selected sites are shown.
6\. If someone without an Ento user should read the meter, add their email under "Other email addresses"
Separate multiple addresses with a comma.
7\. Click "Save"
The schedule is now shown in the overview. The "Status" column shows whether the meter is "On track" or late (e.g. "7 days late"), and the date in the "Due" column turns red when a reading is overdue.
Send a reminder
If a reading is overdue, a "Send Reminder" button appears next to the meter. Click "Send Reminder" and confirm with "OK" to send the reminder again.
Register a reading from the reminder email
1\. Open the reminder email and click the button to read the meter
2\. Enter the value shown on the meter
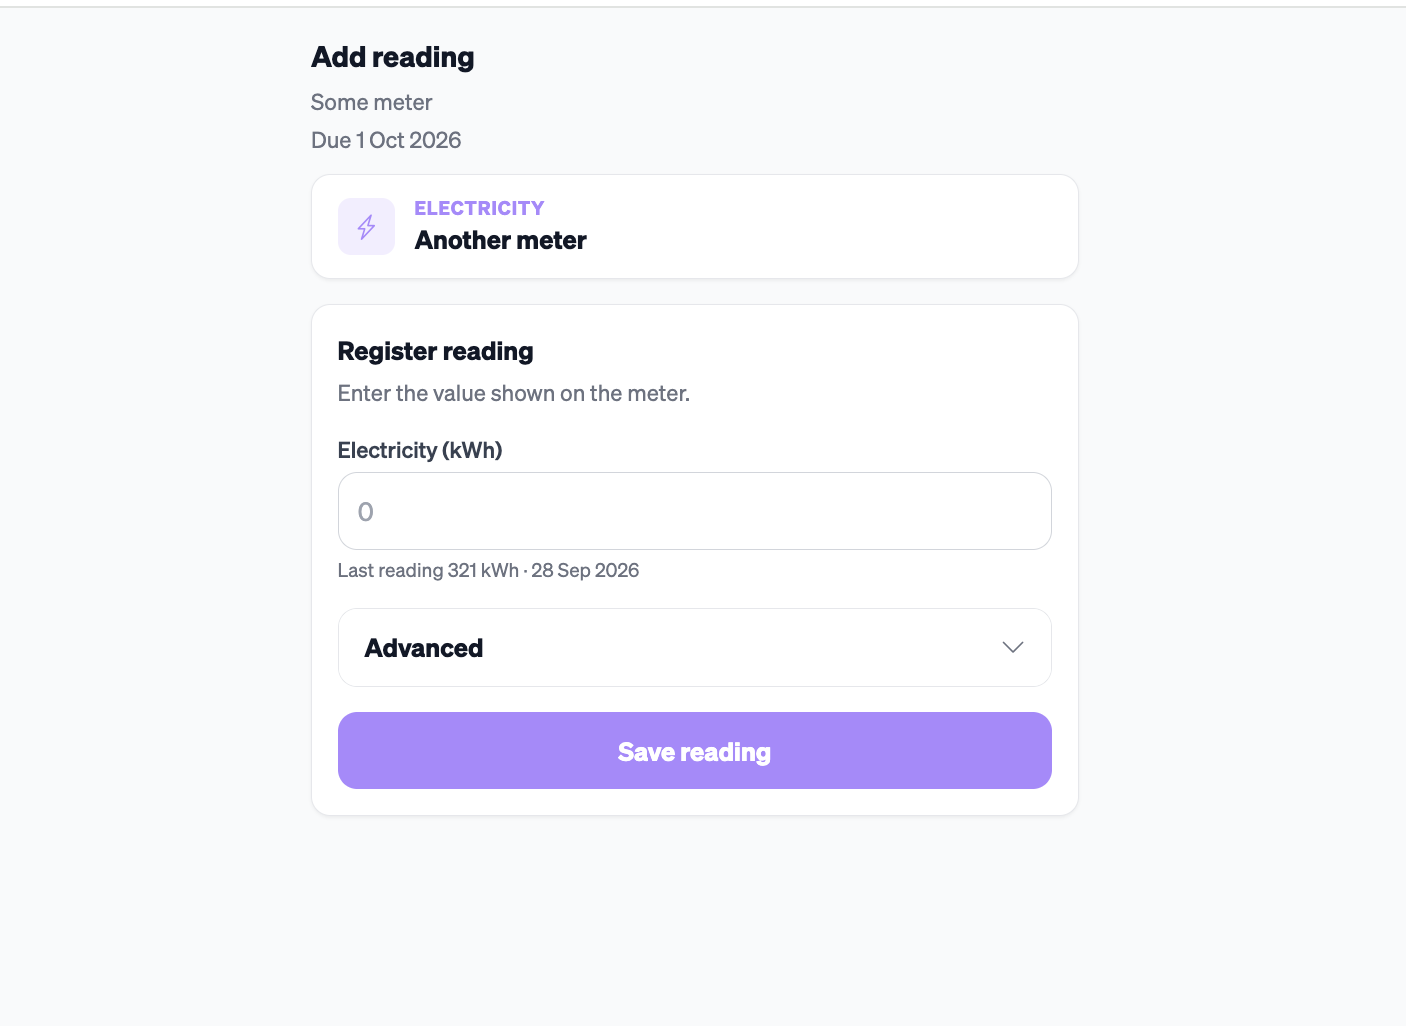
3\. If needed, open "Advanced" to change the time of the reading (it is prefilled with the current time) or to add a comment
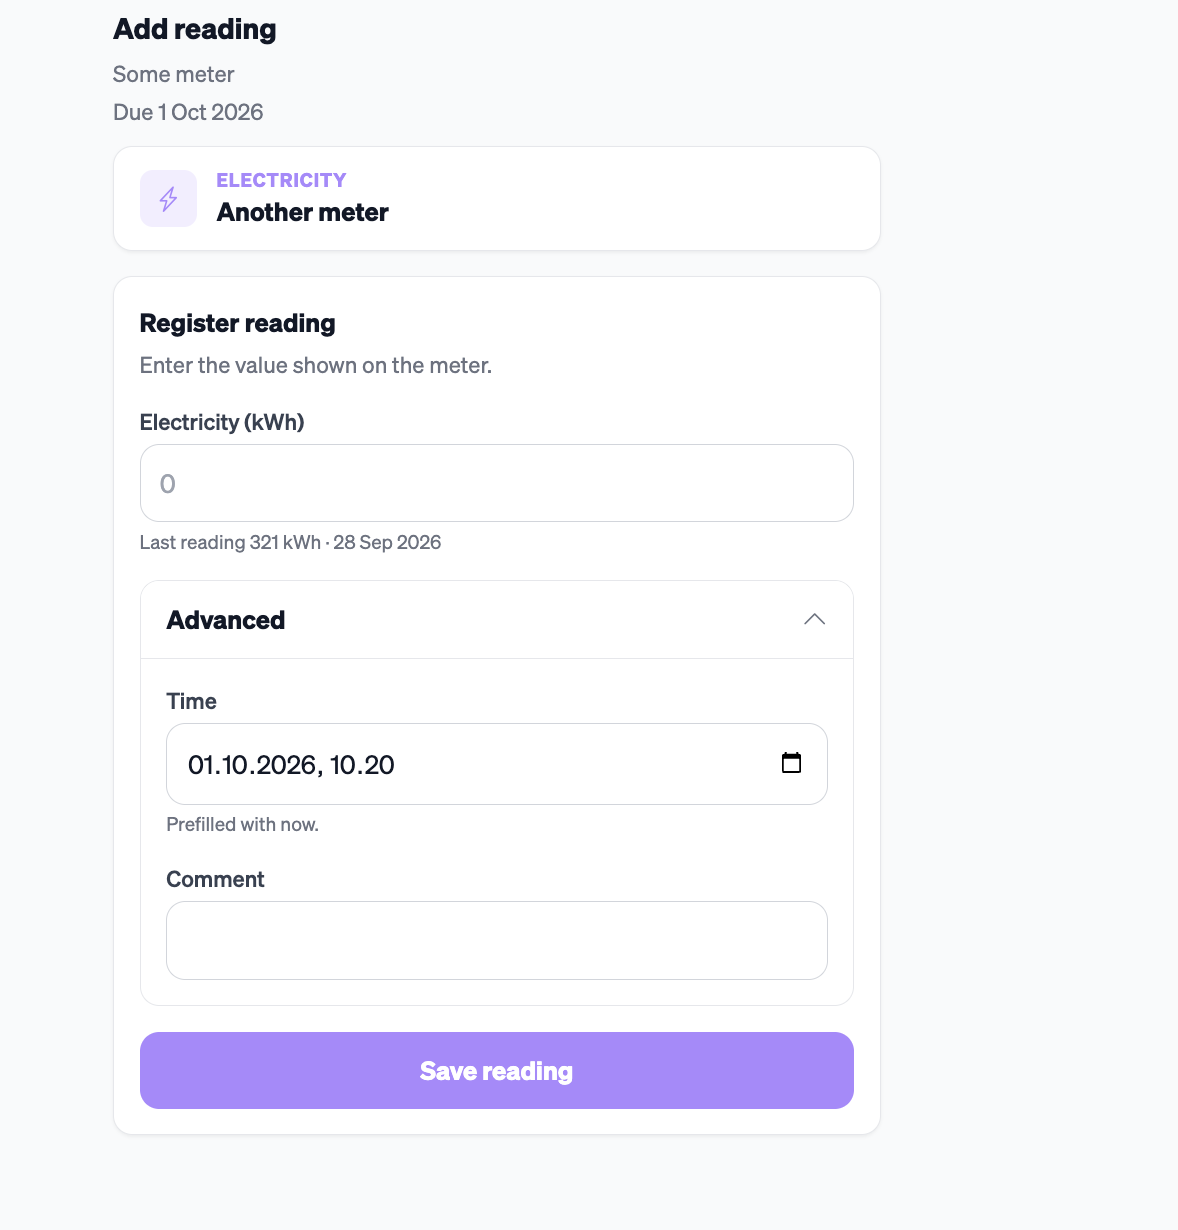
4\. Click "Save reading"
If there are more readings waiting, they are listed under "Pending readings", so you can continue straight to the next meter. When all readings are done, you can close the page.
See the registered readings
Go to "Settings" → "Manual Meters" and click the meter. Under the "Readings" tab, you can see all registered readings, and under "Audit" you can see who registered each reading and when.